
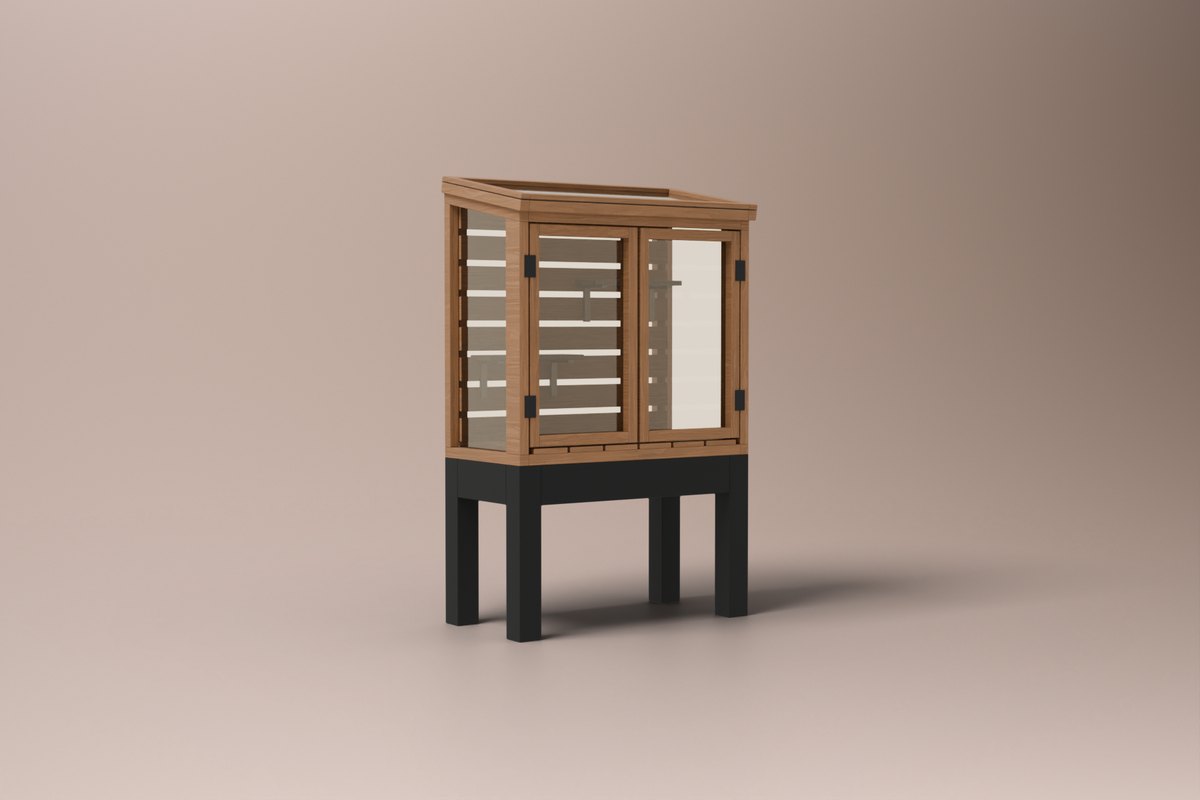
Drag to turn it. 3D model render, drawn from the plan itself; photos of the finished piece are coming soon.
Bask Greenhouse Cabinet
A designer greenhouse cabinet you build yourself, in the style of the $5,000+ teak-and-glass ones. A cedar 2x2 frame glazed with clear acrylic, two doors across the front, a lid that slopes to the front and lifts on two stays for air, and a slatted cedar back that breathes and takes a shelf bracket anywhere. It stands 24 inches up on a black-painted stand, so you tend plants standing up, and it lifts off the stand to sit on a bench as a cold frame. Both widths come with the plan, each with its own cut list, shopping list, PDF and 3D guide.
- Skill
- Maker · Level 2
- Build time
- About 8 hours
- Size
- 41" × 21" × 64¼"W × D × H
- Lumber
- 22 boards + 2 acrylic sheets
- 40 in. wide41 × 21 in
- 48 in. wide49 × 21 in
Each with its own cut list, shopping list, PDF and 3D guide.
Build-ready or your money back. If anything in the plan doesn't work as drawn, email us within 30 days for a full refund.
You buy the materials at Home Depot, not here. Cedar: from $505.
- Printable plan and interactive 3D build guide
- One-trip Home Depot shopping list
- Yours to keep. Build it as many times as you like
68 parts for the 40-inch cabinet, 16 cut lengths. The post tops and the top rails share one 10° saw setting; every other cut is square.
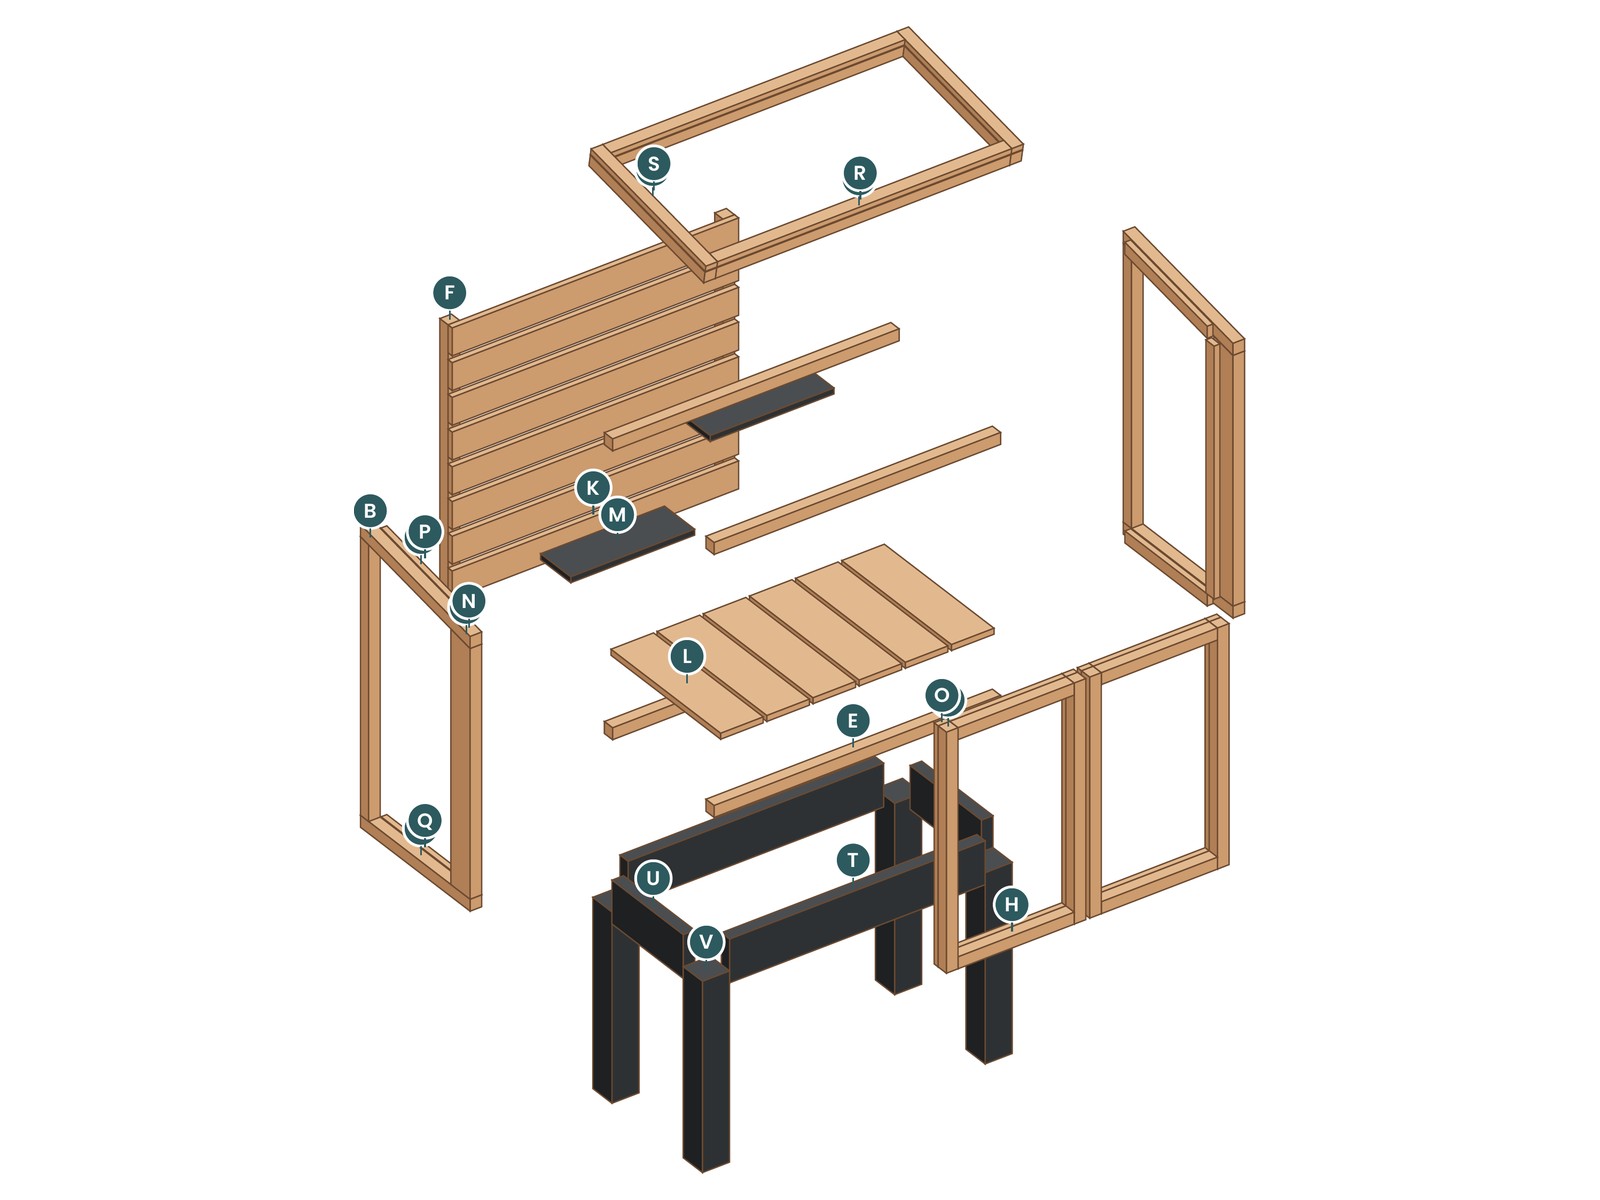
Every part gets a letter you pencil on its end. The drawings, the cut list, the cutting diagrams and the 3D guide all use the same letters, so you always know exactly which board you are holding.
- DrawingsFront, side and top views with dimensions
- Cut listEvery part by letter, board and length
- Cutting diagramsWhich part comes from which 2x2, 1x4, 1x6, 1x2, 2x4 and 2x6
- 8 stepsEach with time, check and common mistake
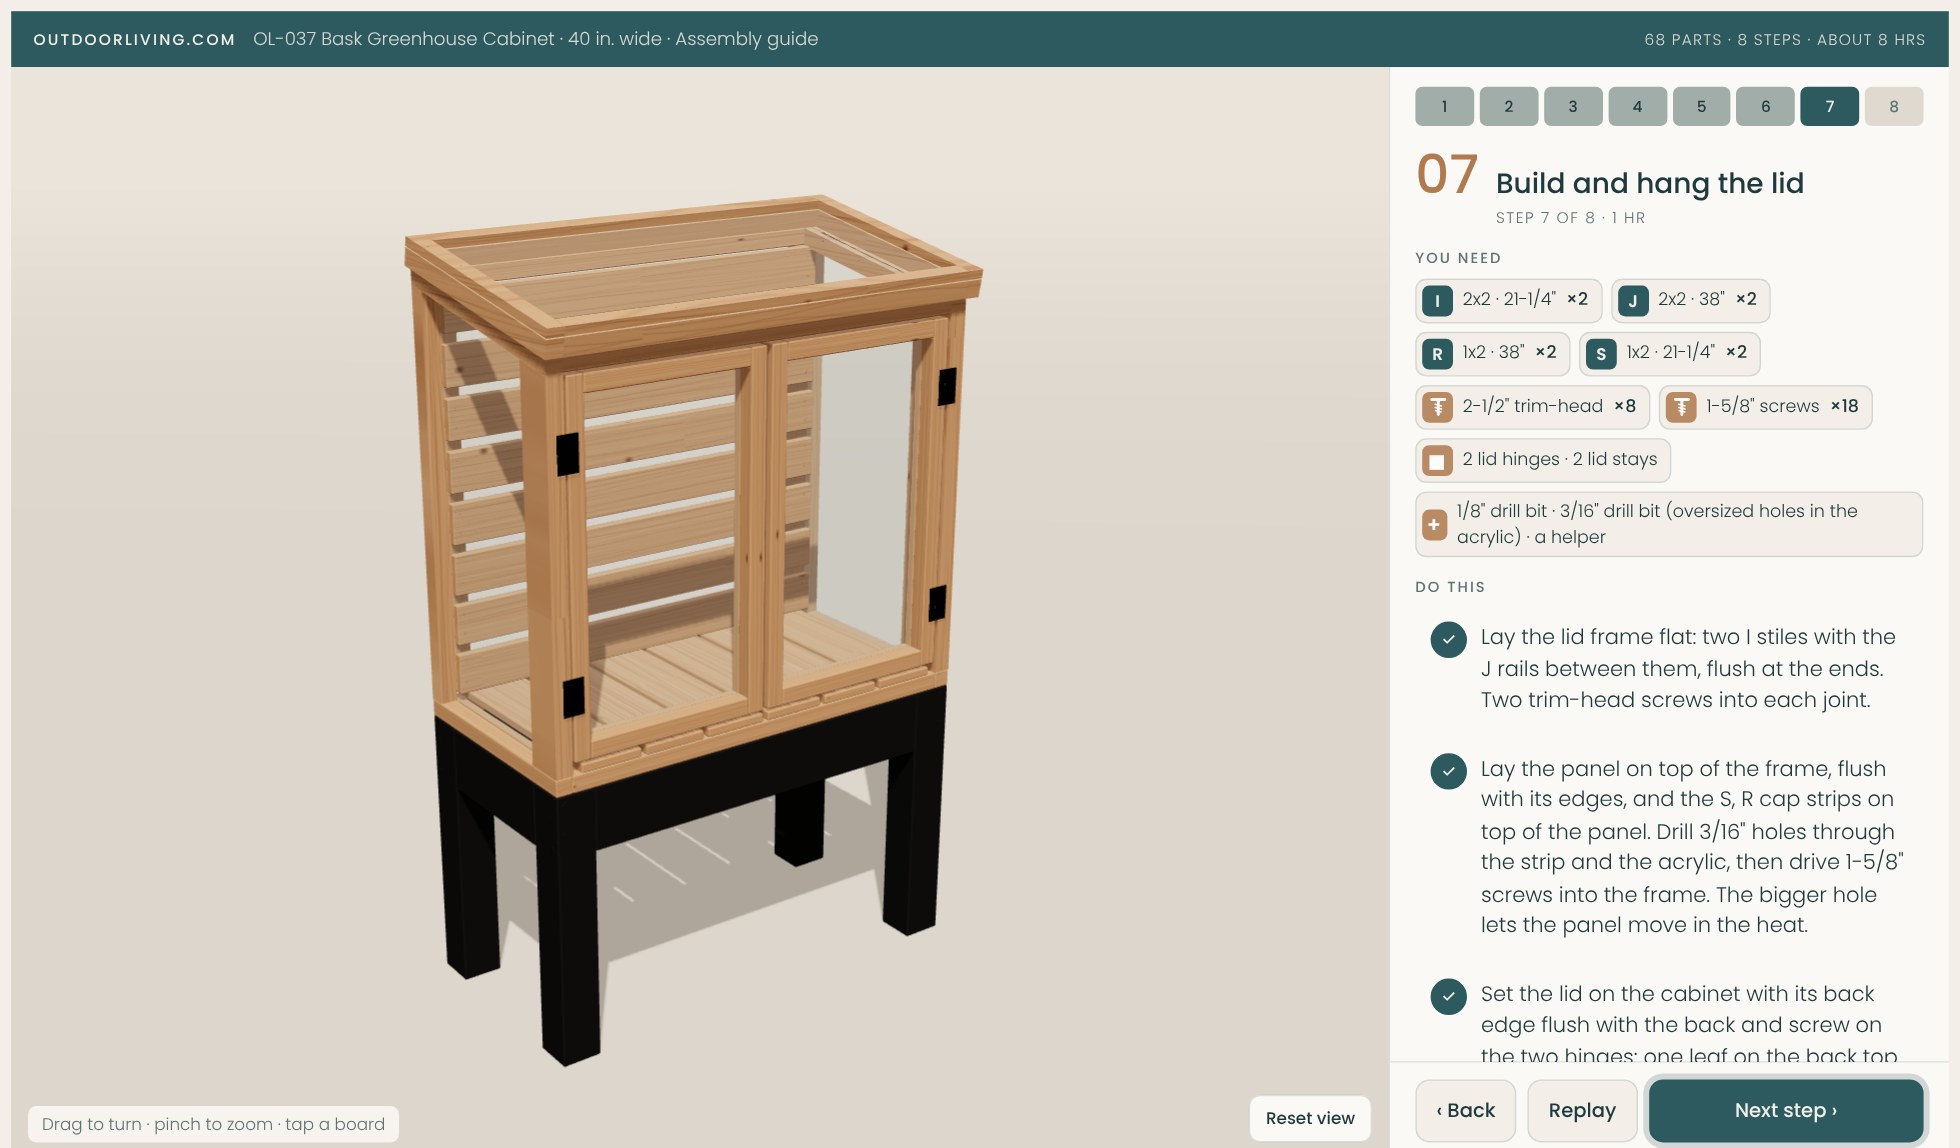
Try the build guide before you buy.
The first 2 of 8 steps are free. It’s exactly what you’ll follow in the garage, on your phone or laptop.
- Watch each step build itself, board by board, screw by screw.
- Spin and zoom the model with your finger or mouse.
- Tap any board to see its letter and cut size.
 Try steps 1–2 free
One list. One trip to Home Depot.
| Item | Qty |
|---|---|
| 2x2 × 8 ft pressure-treated pine (frames, doors, lid): pick the straightest, and let them dry first | 8 |
| 2x4 × 8 ft pressure-treated pine, #2 Prime (front posts) | 1 |
| 1x4 × 8 ft pressure-treated pine (back slats) | 4 |
| 1x6 × 8 ft pressure-treated pine (floor and shelves) | 2 |
| 1x2 × 8 ft western red cedar (glazing stops and the lid's cap strips; there is no treated 1x2) | 5 |
| 2x6 × 8 ft pressure-treated pine, #2 Prime (stand aprons) | 1 |
| 4x4 × 10 ft pressure-treated pine post, ground contact (stand legs) | 1 |
| Clear acrylic sheet, 3/32 in. × 36 in. × 72 in. (OPTIX or similar), for the sides and doors | 1 |
| Clear acrylic sheet, 3/32 in. × 24 in. × 48 in., for the lid | 1 |
| 5" exterior structural screws, black (GRK RSS or SPAX), for the stand corners | 16 (1 × 25-pack) |
| 2-1/2" exterior wood screws, rated for treated lumber (stiles, cabinet to stand) | 10 (1 × 1 lb box) |
| 2-1/2" exterior trim-head screws, rated for treated lumber (frames, doors, lid) | 56 (1 × 1 lb box) |
| 1-5/8" exterior coated screws, rated for treated lumber (stops, slats, floor, cap strips) | 120 (1 × 1 lb box) |
| Black non-mortise door hinges, 3-1/2 in. (2 per door) | 4 |
| Black hinges, 3 in., for the lid | 2 |
| Lid stays (lid supports), to hold the lid open | 2 |
| Magnetic catches, black (1 per door) | 2 |
| Black steel shelf brackets, 5 × 7 in. (2 per shelf) | 4 |
| Exterior paint, satin black (stand and shelves) | 1 qt |
| Behr semi-transparent stain & sealer, Cedar Naturaltone | 1 qt |
| Plastic scoring knife, for cutting the acrylic | 1 |
- Estimated build cost
- $440–$480
- Pick #2 Prime boards and sight down each one. Take the straightest and grab one spare of each size.
- Treated pine comes wet. Stack the boards flat with scrap spacers between them, out of the sun, for 2–3 weeks before you cut. Dry boards don't shrink or twist after you build.
- Use screws labeled for treated lumber (most coated exterior screws are).
- Sand the faces and edges smooth, then stain once the wood is dry. A cedar-tone stain gives it the honey look in the photos.
- Wear a dust mask when cutting and sanding treated wood, and never burn the scraps.
Estimates based on typical Home Depot prices; your store may vary. Same cuts and same steps in either wood. The list updates with the version you pick.
8 steps · about 8 hours
- 1Cut the parts, paint the stand, cut the acrylicFree in 3D1 hr 30 min + drying
- 2Build the standFree in 3D45 min
- 3Build the two side frames1 hr 15 min
- 4Stand the sides on the stand and join them45 min
- 5Floor and back45 min
- 6Build and hang the doors1 hr 15 min
- 7Build and hang the lid1 hr
- 8Shelves and finish45 min + drying
Good to know
What's a Maker plan?
Our Easy Build plans keep to four cut lengths, no metal hardware to fit and ten simple steps. Maker plans go further for projects that need it: this one has more cut lengths, one 10° saw setting for the lid's slope, acrylic to score and snap, and hinges, lid stays and catches to fit. Every screw was checked in 3D to land in solid wood.
Which widths are in the plan?
Both. 40 inches wide (41 over the lid), the classic size, and 48 inches (49 over the lid) with wider doors and a two-panel lid. Each has its own cut list, shopping list, printable PDF and 3D guide.
Is it real glass?
The main build is clear 3/32-inch acrylic from Home Depot: it reads as glass, it's light, and it takes a knock. The panels sit inside the frames behind 1x2 cedar stops with the screws through the bare half of each stop, so there is never a hole in the acrylic, and a cracked panel swaps out in minutes. Prefer real glass? The same frames take 3/16-inch tempered glass cut to the panel sizes by a local glass shop (about $300 more), and the plan includes the glass order sheet. Twin-wall polycarbonate fits the same way if you want the cabinet to hold more heat.
Will it keep plants warm?
It's a cold frame, not a heated greenhouse: single-pane acrylic takes the chill off frosty nights for seedlings, herbs and tender plants, and the slatted back means it never gets stuffy. On warm days lift the lid; in a hot climate keep it out of the afternoon sun or prop the lid open all day.
How do the doors and the lid work?
Two framed doors swing out on black surface hinges with a magnetic catch each. The lid slopes 10 degrees to the front so rain runs off, hinges at the back and lifts to about 35 degrees on two lid stays. The two shelves sit on black steel brackets screwed into the slats, so they move wherever the plants need them.
Can I build it in pine to save money?
Yes. The plan has a second shopping list in pressure-treated pine with a cedar-tone stain: same cuts, same steps, same hardware. The 40-inch cabinet comes to about $440–$480 in pine against $505–$555 in cedar, including the acrylic and hardware. Pick the straightest 2x2s and let them dry before you cut; wet treated 2x2s twist. The stand is pressure-treated and painted black in both builds.
Where should it go?
On a patio, a deck or beside the kitchen door, against a wall that gets morning sun. It weighs about 120 pounds with the stand, so it stays put; the cabinet lifts off the stand for a two-person carry, or to sit on a bench on its own.